Showing posts with label nutrition. Show all posts

Monday, January 26, 2015

Cabbage...Says It All

In the olden days, one ate cabbage, turnips, and sweet potatoes in the fall and winter. You had no choice. You ate it or you went hungry.

Well, children nowadays have everything. They get peaches, lettuce, watermelon and everything else all year long. Don't get me wrong; I am all for progress. But does there come a time when progress is no longer progress? I say let's eat a few root vegetables and cool season crops this winter. They are usually inexpensive, low in calories, a good source of fiber, vitamins A, C and folate. They are just plain good for you, so eat up.

To help your winter vegetables go down a little easier, I am offering up a recipe for creamed cabbage. I told one of my colleagues that the only way my mother prepared cabbage was with pork fat. Her response was, "Well, I'd add some of that too". I left it out, but feel free to add bacon if you like.

Creamed Cabbage

Serves 4 to 6.

Ingredients:

1 medium green cabbage, cored and thinly sliced
1 medium yellow onion, finely chopped
2 garlic cloves, minced
1 Tablespoon grated ginger, heaping
2 Tablespoons butter
3/4 cup heavy cream
Salt and pepper, to taste

Directions:

1.  In a large skillet, heat the butter over medium heat until it melts and starts to bubble. Add onion and cook until translucent, about 5 minutes. Add garlic and cook for an additional minute. Stir in ginger and cook for another minute.

2. Add cabbage and stir to coat cabbage with butter. Cover with a tight-fitting lid. Cook, stirring occasionally, for about 15 to 20 minutes, until cabbage has softened and slightly browned.

3. Reduce heat and stir in cream. Scrape up any browned bits from bottom of the pan. Cover an cook on low for about 10 minutes. Remove the lid, taste for salt and pepper. Cook until most of the liquid has evaporated and cabbage is coated with cream.


Monday, January 12, 2015

A New Year, A New Start

I've been writing about starting to cook for quite some time. So far, I'm just short of preaching. I don't mean to nag. But I believe there is value in preparing one's food at home. Food is communal. We create memories in the kitchen. A lot of our lives revolve around the kitchen. 

For me cooking is creating. I like knowing that I can make something. And I do enjoy it when people like something I cook. I cook for my enjoyment and for the enjoyment of those I feed. All my dishes are not masterpieces or works of art. Sometimes I just need to get dinner on the table. So I have a few things like eggs and pasta that I frequently fall back on.

Convenience ingredients are great for getting meals on the table. Try rotisserie chicken, bagged salads, frozen vegetables (without sauce), canned beans, fresh pasta, and pre-made pizza dough.

If you need a scientific reason to cook, here's one. According to a paper published in Public Health Nutrition, adults who cooked dinner 0 - 1 times per week consumed 2300 calories on an average day. Those cooking 6 - 7 times per week consumed 2163 calories on an average day. While that is only 136 calories, multiply 136 calories by 365 days. Get the picture?

Here is my recipe to help you get started. It is a Stromboli.   A Stromboli is an Italian-American sandwich of pizza dough wrapped various fillings. I chose spinach, onions, ham and cheese. 

Spinach and Ham Stromboli

Serves 4.


Ingredients:

½ medium onion, chopped
Olive or vegetable oil
4 ounces deli ham
1 package (16 ounce) frozen chopped spinach
6 ounces grated cheese, about 1½ cups
1 container (13.8 ounce) refrigerated whole wheat pizza dough
Pizza sauce

Directions:

1.  Heat about one tablespoon of oil in a medium skillet. Add onion and cook until translucent, about 5 minutes.
2.  Remove onion and set aside. Add ham to skillet. Cook until ham has dried out and begins to brown. Remove from skillet and set aside.
3. Add another tablespoon of oil to skillet. When oil is hot, add spinach. Cook until spinach until most of the water has evaporated. Set aside.
4.  Coat a work surface lightly with flour. Unroll dough onto floured surface.  Roll dough into a rectangle, about 11 X 14-inches.
5. Brush dough with oil. Top with cheese to within one inch of the edge.  Add onions, ham and spinach.
6. Roll dough up jellyroll fashion. Place bottom of dough on cookie sheet. Brush top of dough with oil. Bake at 400°F until crust browns, about 20 to 30 minutes. Cool for 10 minutes. Slice into 1-inch slices. Serve with pizza sauce.

Note: Onions, ham, and spinach can be cooked in advance (one to two days) and refrigerated until ready to use.


Tuesday, November 11, 2014

Get Cookin'

Yes, Get Cookin'. This is campaign from the American Diabetes Association. Now I have been saying this for quite some time, but for fun. Now, we have a health reason to do it.

November is American Diabetes Month - a time to come together and raise awareness of this ever-growing epidemic that is facing our nation. And what better time to start thinking about how you can cook healthy and tasty meals, and get moving - to Stop Diabetes®.

Choosing a healthy lifestyle is one of the most important things you can do to manage or prevent diabetes. That’s why, all month long, we are asking America to get cooking to Stop Diabetes.
 
For additional help on cooking to Stop Diabetes check out  American Diabetes Association.
 
For my cooking efforts this month, I chose a new cook book - Good and Cheap: Eat Well on $4/Day by Leanne Brown.
 
 I chose Spicy Green Beans. The recipe makes two servings, but can be easily doubled.

 Spicy Green Beans

Yields 2 Servings
Ingredients
 
1 teaspoon vegetable oil
½ pound green beans, ends trimmed, chopped into bite-size pieces
2 cloves garlic, finely chopped
1 teaspoon soy sauce
1 teaspoon sambal oelek (or 2 teaspoons chili flakes)
1 teaspoon ginger, grated
1 teaspoon lemon juice

Directions
1.  Add vegetable oil to a frying pan on medium heat. Once it’s hot, add the green beans. Cover and cook undisturbed for about 1 minute.
 
2.  In a small bowl combine garlic, soy sauce, sambal oelek, ginger, and lemon juice.
 
3.  The beans should have turned bright green. Add about ¼ cup of water to the pan. Cook another 2 minutes, until the water is mostly gone. Pour the sauce into the pan and toss gently to coat. Cook another 2 minutes, until everything is fragrant and most of the liquid is gone. Poke the beans with a fork: if it goes through easily, they are done. They should take about 5 minutes.
 4.      Taste and add more chili sauce or soy sauce if you want the beans hotter or saltier.
 Note: Sambal oelek is an Indonesian flavoring paste made from ground bird chilies, salt, oil and vinegar.


ENTER A DRAWING FOR A $50 AMAZON.COM GIFT CERTIFICATE
 
 
Since July, five co-workers and I have been offering recipes and tips for using seasonal fruits and vegetables in our newsletters and blogs. This blog post contains a link to a survey to learn how you were able to use this information. 
 
 
Complete a short survey (5 - 10 minutes), and enter the drawing by clicking here.   
 
ENTER BY TUESDAY, NOVEMBER 25, 2014 
 
If you've never shopped on Amazon.com, you can buy everything from clothing to computers to cookware! 

Monday, July 14, 2014

Traveling South

This summer I had the pleasure of 'traveling south'. As you know, all 'northerners' love to go to the south. Funny, southerners only travel north for a funeral, but that's a blog for a different time.


Mayfield Dairy Cow, the Welcome Sign for Ruby Falls, Chattanooga, TN

My first stop was Huntsville, AL. My friends and I went to dinner at Posey's Restaurant. The food was good and brought back great memories for a displaced southerner, fried chicken, fried fish, pinto beans, and cornbread sans sugar. You get the picture.

Blount Museum in Knoxville, TN
 
The main draw of Posey's seems to be the buffet. On one of my many visits to the buffet, I noticed an older gentlemen crumbling cornbread onto a plate. Onto which he then poured likker from the pinto beans. He ended up with a few beans, not too many, he was aiming for the likker. He told us that as a child, he would put extra water in the beans, just to make sure there was enough likker for his cornbread.

Nutritionist talk about legumes and grains forming complete proteins. That is, they contain all the essential amino acids in the right proportion to substitute for meat. I am sure this gentlemen knew none of that, but he knew beans and cornbread is a 'darn good' combination. And sometimes, that's all that matters.

Since I also stopped by the Lodge Factory Outlet Store in South Pittsburg, Tennessee, I thought writing about beans and cornbread would be great. I know it's the middle of summer, but I still like beans and cornbread. And besides I break in my new Lodge skillet.

Blount Museum in Knoxville, TN
  
As I began to think more about this posting, I started to wonder how beans and cornbread came to be. So I googled it. Turns out, there are tons of hits for beans and cornbread. Guess I am not the only one eating them.

Here is my recipe for beans and cornbread. I kept them both simple and original. That is, I am using pork fat.

Pinto Beans

Serves 4 to 6.

Ingredients:
1 cup dry pinto beans
2 slices bacon or about 4 ounces smoked meat, pork or turkey
1 hot pepper pod or 1/4 teaspoon red pepper flakes
Salt and black pepper, to taste

Directions:
1.  Sort beans to remove any rocks and partial beans. Rinse beans in cold water. Place beans in container cover with water to about 2 inches above the beans. Refrigerate overnight.

2. Drain beans and rinse. Add beans to a large pot. Cover with water to about 2 to 3 inches above the beans. Cover and simmer for about 2 hours until beans are tender. Add more water if necessary.

Cornbread

Ingredients:

¼ cup bacon fat
1 cup yellow corn meal
½ cup all purpose flour
1 teaspoon salt
1 Tablespoon baking powder
½ teaspoon baking soda
1 cup buttermilk
½ cup milk
1 large egg

Directions:

1. Preheat oven to 400F. Place bacon fat in skillet and heat, either on the stove top or in the oven.

2. Combine corn meal, flour, salt, baking powder, and baking soda in a mixing bowl. In a separate bowl, combine buttermilk, milk, and eggs.

3. Add wet ingredients the corn meal mixture. Stir to combine.

4.  Pour hot bacon fat into batter and stir gently. Pour batter into hot skillet and bake for 20 to 25 minutes or until golden brown.

Source: The Pioneer Lady

Wednesday, October 16, 2013

Apples, More than Apple Pie

 
According to the calendar, it's fall.  According to the temperature, it's fall. 

For me, when fall rolls around, it's time to cook heartier dishes.  I want to cuddle up with warm food.  Turning on the oven means I don't have to turn on the heat.  Killing two birds with one stone.

Last week my local newspaper ran an article on the health benefits of apples.  If you need more reasons to eat apples here are few.
  • They are low in calories.  A medium size apple has only 80 calories.  They contain no fat or sodium.
  • They are a good source of vitamin C. 
  • About half of the fiber in apples is in the peel.  An apple with the peel contains about 3.3 grams of fiber, whereas, one without the peel has about 1.7 grams of fiber.  Applesauce and apple juice contain even less fiber.
  • Consumed whole, apples are a convenient and mess free snack. 
It seems that when we think of apples, we immediately think of pie, crisp and maybe applesauce.  That's too bad.  Apples work well in savory dishes.  They are a nice accompaniment go meats such as, pork and chicken.  Give them a try.

I decided to pair apples with sweet potatoes for an easy fall side dish.  Apples play a supporting role in this dish.  Stay tuned, we will cook apples again.  In the meantime, try this recipe for candied sweet potatoes with apples.

Candied Sweet Potatoes with Apples

Serves 4. 

Ingredients:

⅓ cup brown sugar, packed
2 Tablespoons water or apple juice
1 Tablespoon butter
¼ teaspoon cinnamon
1 pound sweet potatoes, about 3 medium
1 large apple
¼ cup pecans, toasted and chopped

Directions:

1.  In a small saucepan combine, brown sugar, water or apple juice, butter, and cinnamon.  Heat on low heat until sugar dissolves and butter melts.

2.  Coat a two-quart baking dish with cooking spray.

3.  Wash and peel sweet potatoes.  Cut into 1/2-inch thick slices.  Wash and core apple.  Cut into 12 wedges.  Layer apple and sweet potato slices in baking dish.  Pour sugar mixture over apple  and sweet potato slices.  Cover with lid or foil. 

4.  Bake in an oven preheated to 350°F for about 45 minutes.  Remove covering and cook for an additional 15 minutes.  Top with pecans and serve.

Tuesday, August 20, 2013

We Want Breakfast!

According to a recent report from the Mintel Group, consumers consider breakfast to be the most important meal of the day, even more than lunch or dinner.  Specifically, a 2009 International Food Information Council Foundation's Food and Health Survey found that 93% of Americans consider breakfast to be the most important meal.  In contrast, 87% feel this way about dinner and 81% say the same thing about dinner.  Even though 93% of consumers believe breakfast is important, only 44% eat breakfast everyday.

Now here is a little info to help those non-breakfast eaters think about that morning meal.

An NPR story reported that people who consume breakfast have reduced risk of heart attack.  A study conducted by Harvard School of Public Health, finds that men who routinely skipped breakfast had a higher risk of having a heart attack or dying from coronary heart disease compared to men who ate breakfast.  Even when the researchers accounted for differences in diet, smoking patterns and exercise patterns, there is still an elevated risk of heart attack among the non-breakfast eaters. 

It seems that most Americans want  breakfast-on-the-go.  Hand-held breakfast food is the fastest growing segment of the frozen food market.  Below is a recipe for blueberry muffins to help you get an on-the-go breakfast.  They can be made a head of time, frozen until you are ready for breakfast. These can be made as muffins or muffin tops.

Blueberry Muffin Tops

Makes 12.

Ingredients:

6 Tablespoons butter
⅓ cup milk
1 large egg
1 large egg yolk
1 teaspoon vanilla
1½ cups all purpose flour
¾ cup sugar
1½ teaspoons baking powder
¾ teaspoon salt
2 cups fresh blueberries

Topping:

1½ Tablespoons butter, cut into small pieces
¼ cup all purpose flour
2 Tablespoons sugar

Directions:

1.  Batter.  Preheat the oven to 375°F.  Coat the muffin pans with cooking spray.

2.  Melt butter in a small saucepan over low heat,  Remove from heat.  Whisk in milk, whole egg, egg yolk, and vanilla.  Stir to combine.

3.  Whisk together flour, sugar, baking powder, and salt in a bowl.  Add milk mixture and stir until just combined.  Gently fold in blueberries.

4.  Divide batter among 12 muffin cups.

5. Topping.  Blend together topping ingredients until crumbly.  Sprinkle evenly over batter. 

6.  Bake until golden and crisp, about 18 to 20 minutes.


Wednesday, July 31, 2013

A New Look at Potato Salad

If you follow this blog you know that I like potato salad. It seems that most people eat potato salad mainly in the summer months.  But in my family, it's an 'anytime' food.  We even eat it at Christmas dinner.  I asked my sister why we have potato salad for Christmas dinner.  Her reply was, "I don't know.  We just do.  We always have and we always will."  Enough said.  Our potato salad is normally laden with mayonnaise and eggs.  While it is good, sometimes change is also good. 

It's still officially summer and we have a few more opportunities for picnics, potlucks, and dinner on the ground.  I thought I would bring out my new potato salad recipe.  This one is made sans mayonnaise and eggs.  This recipe is based on one found on the blog, Olive Tomato.  I added red bell pepper, because it gives the recipe a nice bright color, a little crunch and a few antioxidants don't hurt either. For acidity, either red wine vinegar or lemon juice can be used.

Mediterranean Potato Salad

Serves 4 to 6.

Ingredients:

2 pounds potatoes, Yukon Gold or Russet
½ small red onion, chopped
½ cup chopped red bell pepper
1 teaspoon Italian seasoning
2 Tablespoons extra virgin olive
3 Tablespoons red wine vinegar or lemon juice
Salt and pepper, to taste

Directions:

1.  Wash potatoes, place in a sauce pan and cover with cold water.  Place a lid on sauce pan and cook until potatoes can be easily pierced with a fork.

2.  Drain and cover with cold water.  When potatoes are cool enough to handle, cut into cubes, about ½-inch.  (Peeling is optional.)  Add onion and bell pepper to potatoes.

3.  In a small bowl, combine Italian seasoning, olive oil, vinegar or lemon juice.  Gently stir the dressing into the potatoes.  Add salt and pepper to taste.  Serve warm or at room temperature.

Monday, July 22, 2013

'Fun with Healthy Food' Day

I was recently asked by the Lancaster County Extension office to help with their 'Fun with Healthy Food' Day.  I jumped at the chance.  Any time I have an opportunity to push food, I'm on it.  My colleague stated that she wanted them to cook and to have fun doing it.  The great thing about cooking and kids, they see cooking as fun.  They love getting in the kitchen and cooking. 

We started off the day with hand washing. Cleanliness is the first step to preparing food.  The kids got to use GloGerm to see how good they were at hand washing.  

Next on the list was pancakes.  We made whole wheat pancakes and the kids thought they were great.  Of course, we let the kids add bananas, chocolate chips and blueberries.  After all, no one said healthy had to be boring.

Lunch was vegetable pizza.  It took a little cajoling from the leaders to get a few more vegetables on some pizzas.  We started with a ready made crust, added purchased tomato sauce, and vegetables.

For dinner, we decided to make salads.  We started with a base of romaine and red leaf lettuces and let the kids add various toppings, like hard boiled eggs.  We even made our own salad dressing, Roasted Red Pepper Ranch Dip and a Dijon Mustard Vinaigrette.  Kids had a great time making the dressings and thought they were out of this world.

Crafting is also a part of this day.  We decided to craft a centerpiece.  Out of what else...you got it - fruit.  We made apple turkeys.  Or at least that is what we called them. 

Before you little ones head back to school, give some of these ideas a try.  Bet your kids will think these foods are great!

Enjoy the last few days of summer.

Wednesday, July 10, 2013

I'm Baaaaaaaaack!

It's been a while since I have posted.  I could tell you that I have been on vacation.  But the real truth is I've just not been in the blogging mood.  It just hasn't been there.  But at some point, you just gotta pick up and go on.  For my return post, I decided to focus on berries.  And yes, they are attached to a cake. 

I first found this recipe in an old Gourmet magazine, and thought it would make a good blog.  The recipe is for lemon sun cakes with berries and cream.  It just sounded so cute!

It makes six little cakes.  They are baked in small brioche molds.  If you don't have them, use a muffin tin.

I served my cakes with black raspberries (because I have a back yard full of them), blueberries, and red raspberries (because they were on sale).  Strawberries would have also been good in this mix.  These fruits contain a group of compounds, anthocyanins that are responsible for the red, purple, and blue colors of fruits, vegetables, and grains.  Some research shows that these compounds may reduce the risk of cancer, diabetes, and cardiovascular diseases.  My philosophy is that if you can prevent diseases and enjoy it at the same time, it's a win-win situation. 

For a full serving of fruit, serve with ½ cup of berries.

Lemon Sun Cakes with Berries and Cream

Serves 6.


Ingredients:

¾ cup plus 2 Tablespoons all purpose flour
1 teaspoon baking powder
¼ teaspoon salt
¼ cup butter, softened
½ cup sugar
1 large egg
½ teaspoon vanilla
½ teaspoon finely grated lemon zest
½ cup whole milk
3 cups mixed berries
1 Tablespoon sugar
½ cup chilled heavy cream

Directions:

1.  Put oven rack in middle position and preheat oven to 350°F.  Generously butter molds and place on a baking sheet.

2.  Whisk together flour, baking powder, and salt.  Cream butter and sugar at medium speed until pale and fluffy, about 2 minutes.  Add egg and beat until combined.  Add vanilla and lemon zest.

3.  Add about one-third of the flour, followed by one-half of the milk.  Repeat until all
the flour and milk have been added.  Divide batter amount the molds, filling each mold about two-thirds full.  Bake until edges of cakes are golden and a wooden pick inserted in the center comes out clean, about 25 minutes.  Cool cakes in molds on a rack for 5 minutes.  Remove from molds and cool completely on racks.

4.  Combine sugar and cream.  Beat until soft peaks forms. 
 

Thursday, April 11, 2013

A Little Short on Cash

Tax time is almost over.  For me, it was over a few weeks ago.  And things did not go my way - I think the government kept too much of my money.  At least in my humble opinion. 

Well, I gotta eat and being the foodie that I am, I want good food.  I am not one for believing that good food has to be expensive.  I prefer not to think of it as cheap, just frugal.  You make the best of what you have.

For my frugal dish, I went back to something my mother used to make, salmon cakes.  This is one of the most inexpensive dishes you can make.  You need a can of salmon, one egg, and some type of bread to bind it.  Crackers and dry bread crumbs work well for this.  Additional seasonings can be added, like onions, lemon zest,  red pepper, and mustard.  Mix it up to suit your tastes.

Recently, I read where a chef stated that canned salmon was like cat food.  "Meow".  Sorry chef, mom used canned salmon and that's what I use.   Canned salmon is great.  It is inexpensive, a good source of omega-3 fatty acids and if you consume the bones, a good source of calcium.  Here is my recipe for salmon cakes.  Use the recipe as a guideline.  If you want to add or remove something, please do so.

Salmon Cakes with Mustard Sauce

Serves 4.

Ingredients:

1 can (14.5 ounce) salmon
¼ cup dry bread crumbs
⅓ cup chopped red onions
1 Tablespoon Dijon mustard
1 large egg
Vegetable oil, for frying

Mustard Sauce:
1 container (6 ounce) plain yogurt
1 Tablespoon coarse grain or Dijon mustard

Directions:

1.  Drain salmon and mash with a fork.  Add the remaining ingredients and mix thoroughly.  Divide into fourths.  Form into a ball and flatten to about ½ inch.

2.  Heat oil in a large skillet over medium-high heat.  Cook salmon cakes, turning once, until golden brown and just cooked through, 6 to 7 minutes.

3.  Stir together yogurt and mustard.  Serve with salmon cakes.

Wednesday, April 3, 2013

National Soybean Month

April is National Soy Foods Month.  Before you turn up your nose, soy foods have come a long way in the United States.  Gone are the days when we associated soy with poor quality, filler ingredients.  It's the real thang!  And for good reason, soy is a very nutritious food.

If you want to consume soy, edamame is a good place to start.  Edamame are harvested at the green stage and can be purchased in the pod or shelled.  They can be used to make salads, humus, added to soups and stir fries. 

A one-half cup serving of edamame contains 3 grams of fat (primarily mono- and polyunsaturated), 8 grams protein, and 4 grams of fiber.  If you are looking for ways to add soy to your diet, try edamame with mustard vinaigrette and check out Cooking Light Magazine website for more recipes.

Edamame with Mustard Vinaigrette

Serves 4 to 6.

Vinaigrette:
2 Tablespoons red wine vinegar
1 Tablespoon Dijon mustard
½ teaspoon salt
2 Tablespoons extra virgin olive oil

Salad:
1 bag (12 ounce) frozen shelled edamame
⅓ cup chopped red onion
½ cup chopped celery
1 Tablespoon minced parsley

Directions:
1.  Vinaigrette.  In a small bowl combine vinegar, mustard, and salt.  Add oil and stir to combine.

2. Salad.  Add about 1 teaspoon salt to about 4 cups of water and bring to a boil.  Add edamame and cook for about 5 minutes.  Drain well.

3.  Combine edamame, onion, celery, and parsley.  Stir to combine.  Add vinaigrette and stir to coat vegetables.  Cover and chill for 1 hour before serving.

Wednesday, March 27, 2013

Asparagus - A Sign of Spring

I'm not sure that seeing asparagus in the grocery store is a true sign of spring.  Since now, I seem to see it all year round.  For me, seeing fresh asparagus means that spring is not far away. 

Since Easter is coming up in a couple of days, I thought this asparagus recipe would be great for a nice dinner.  This is a recipe I made several years ago.  It was originally published in Cooking Light magazine.  A colleague made it and declared that her family gobbled them straight off the baking sheet.  What more can you say about a vegetable!

For more information on selecting, storing and the nutritional value of asparagus check out the Fruit and Vegetables More Matters website.  Also check out the Local Foods/Seasonal Eating section of UNL-Extension Food Website.  You will find more recipes for asparagus and other seasonal produce.

Roasted Asparagus with Balsamic Browned Butter

Serves 8.

Ingredients:

2 pounds asparagus spears, trimmed
1 Tablespoon olive oil
¼ teaspoon kosher salt
⅛ teaspoon freshly ground black pepper
2 Tablespoons butter
2 teaspoons low sodium soy sauce
1 teaspoon balsamic vinegar
Cracked black pepper, optional

Directions:

1.  Preheat oven to 400°F. 
 
2.  Arrange asparagus in a single layer on a baking sheet.  Coat with olive oil.  Rub asparagus to coat with olive oil.  Bake for about 10 to 12 minutes or until tender.

3.  Melt butter in a small skillet over medium heat.  Cook for about 3 minutes or until lightly browned, shaking pan continually.  Remove from heat and stir in soy sauce and balsamic vinegar.  Pour over asparagu, tossing to coat.  Garnish with cracked pepper, if desired.


Wednesday, February 20, 2013

Pasta and Beans

I have been on this Italian - Mediterranean kick for quite some time.  Frankly, I am fascinated with  the European view of food.  I was also a little skeptical of pasta and beans in one dish.  It just did not sound good to me.  However, I was fascinated enough to pick out the recipe. 

When I really thought about it, Olive Garden makes a pasta e fagioli soup. As it turns out, pasta and bean soup is a traditional Italian dish, made from inexpensive ingredients.  It is traditionally made with cannellini or borlotti beans and some type of small pasta, such as elbow macaroni or ditalini.  Onions, garlic, rosemary or basil are used as seasonings.  Most recipes use tomatoes or tomato sauce.  For a more meaty flavor, prosciutto or pancetta can be used.

I got this recipe from The New Mediterranean Diet Cookbook by Nancy Harmon Jenkins.  A note to this recipe stated that you could make the pasta and beans.  And if there were any leftover, you could add stock and make soup.  Two meals for the price of one, I was 'in'.  I used Jacob's cattle beans.  But you could use pinto, cranberry or a similar light reddish bean.  I also used pesto, about 2 tablespoons, instead of the actual basil.  Pesto was in my frig and basil is too expensive.  Yes, I am cheap.

If you want additional vegetables,  sautéed greens, such as kale or spinach.  Winter squash can also be added to this dish.  If this recipe works out, I'm going to try zucchini.

Day 1.  I made the pasta and beans.  My faithful tasters loved it.

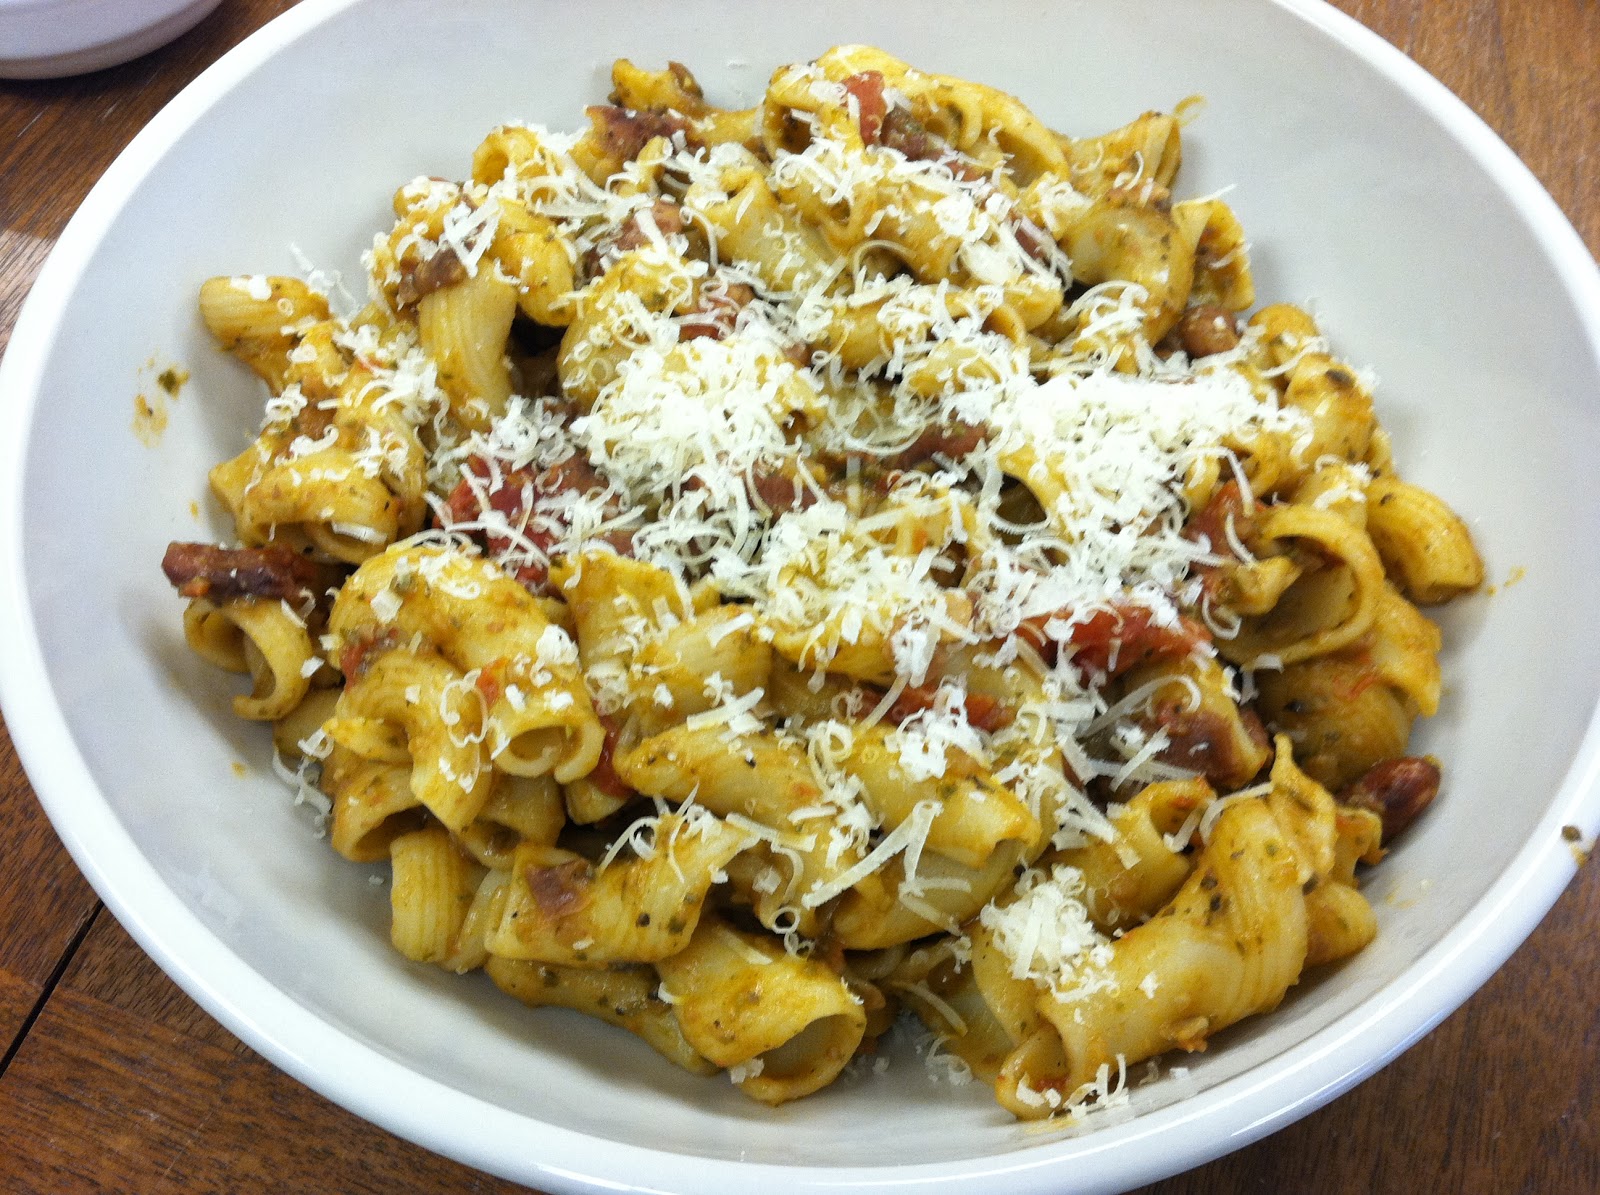
Pasta with Pancetta and Beans

Serves 8 to 10.

Ingredients:

1 cup dried beans, such as borlotti, cranberry, or pink
¼ cup extra-virgin olive oil, divided
1 medium yellow onion
2 large garlic cloves, minced
3 to 4 ounces pancetta, diced
1 can (14 ounce) whole plum tomatoes
salt and freshly ground black pepper
1 pound short pasta, such as farfalle or bowties
¼ cup sliced basil leaves
Freshly grated Parmigiano reggiano

Directions:

1.  Sort, wash and soak the beans.  Drain.  Transfer to a saucepan, cover with water to a depth of about 1 inch above the beans.  Cover and cook until beans are tender, about 30 minutes to 1 hour.  Set aside, reserving one cup of the cooking liquid.

2.  Chop the onion and set aside.  Add 2 tablespoons of the olive oil to a large heavy pan.  Set over medium-high heat.  Add onion and cook until onion is translucent.  Add garlic and pancetta, continue cooking for about 10 minutes, or until the garlic is soft and the pancetta has started to release its fat.

3.  Add tomatoes, breaking them up with the side of a spoon.  Cook, continuing to break up the tomatoes, until they have reduced to a sauce.  Taste and add salt and pepper.  Add beans the cooking liquid.  Return to a simmer and cook for about 10 minutes, to make a thick sauce. 

4.  In a separate saucepan bring about 5 quarts of salted water to a rolling boil.  Add pasta and cook rapidly until the pasta is almost, but not quite, ready to eat.  Drain and quickly add the pasta to the bean sauce, toss to mix well.  Sprinkle with basil or add pesto.  Drizzle with olive oil and top with cheese.

Note: If desired,beans can be made and frozen in individual containers.  Pasta can be added when ready to eat.


Day 2.  Pasta e fagioli.  I added broth and made soup.  My tasters liked it as well.

Thursday, February 7, 2013

Soul Food Junkies

Recently public television aired the documentary Soul Food Junkies.  It was an excellent documentary and very nicely done.  I applaude the producer Bryon Hurt and public televison for tackling this sensitive and diverse subject.  African Americans hold soul food close to their hearts.  Even if we no longer consume soul food on a regular basis, it is still a part of our culture.  Soul food is also very diverse, with everything from collard greens to gumbo.  And no, we don't fry everything we eat.

The soul food diet encompasses lots of healthy foods, such as black-eyed peas, pinto beans, sweet potatoes, watermelon, collard greens, turnips, cabbage.  The 2010 Dietary Guidelines for Americans recommends that we consume these foods.  They are good sources of fiber and beta-carotene.  Collards, turnips and cabbage are member of the brassica family of vegetables.  Research suggests that consumption of these vegetables may reduce risk of certain forms of cancer. 

While the soul food diet is not all bad, it can be high in sodium and fat.  And those things need to change.  But let's don't toss out the baby with the wash water. 

The website for Soul Food Junkies has a 'Pin It to Win It' section.  You can go on the website and find healthier soul food recipes and you can also pin your masterpiece.

I am posting my new 'classic', Black-eyed Pea Salad with Sriracha Vinaigrette.  It's a twist on black-eyed peas. 

Black-eyed Pea Salad with Sriracha Vinaigrette

Serves 6.

Ingredients:

2½ Tablespoons white wine or apple cider vinegar
2 Tablespoons extra virgin olive oil
1 to 1½ Tablespoons Sriracha sauce
½ teaspoon salt
1 bag (16 ounce) frozen black-eyed peas
3 celery ribs
2 carrots
1 red or yellow bell pepper
1 cup lean ham, about 4 ounces
⅓ cup chopped parsley

Directions:

1.  In a small bowl, combine vinegar, olive oil, Sriracha sauce, and salt.  Set aside.
2.  Cook black-eyed peas according to package directions.  Drain.  Rinse in tap water.  Drain and set aside. 
3.  Chop the celery.  Peel and grate the carrots.  Chop the bell pepper and ham.  Combine in a large bowl.  Add black-eyed peas and parsley.  Stir to combine.
4.  Add vinaigrette and stir.  Allow salad to sit for at least 10 minutes or up to one day before serving.

Source:  Whole Foods Market


Wednesday, January 16, 2013

Roasting Vegetables

I am not sure who came up with the idea of roasting vegetables.  Up until a few years ago, I had never heard of roasting vegetables.  Now recipes for roasting vegetables are everywhere.  And why not, it's soooooo easy!  And once you roast vegetables, there are a number of things you can do with them. 


What to do with Roasted Vegetables:
  • Drizzle them with a little balsamic or red wine vinegar
  • Make soup
  • Use them in a quiche (trust me, a real man will eat this one)
  • Use them in a frittata or omelet
  • Use on a pizza

Basics of Making Roasted Vegetables:
  • About one pound of vegetables will serve 4 people.
  • Cut all vegetables roughly the same size, so finish cooking at about the same time
  • Choose a variety of colors and flavors, such as carrots, potatoes, rutabaga and sweet potatoes or pumpkin
  • Bell peppers and onions can be added, but should be added about half way through
  • Roast in a single layer on a rimmed baking sheet
  • Use a metal pan, which will help the vegetables crisp up
  • Vegetables roast best in a very hot oven, around 400° to 425°F
  • Keep the seasonings simple, a little salt and pepper is about all that is really needed.  If desired, toss warm vegetables with fresh parsley and a little lemon juice
  • Coat vegetables evenly with oil.  I prefer olive oil, but any oil will work
  • Roasting vegetables requires about 30 to 45 minutes


Wednesday, January 9, 2013

Food Trends of 2013

I just love food trends. I am not sure why.  Maybe it's the foodie/wanna be statistician in me.  But they are just plain fun.  So, of course I had to find out what the top food trends were for 2013.  I checked out several sources, 'cause that's what us science folks do.  Food Network had Eight Top Food Trends of 2013.   It sounds like they got tired and just could not get to ten.  Maybe I'm a bit cynical, but I feel a little shortchanged with only eight.  Epicurious.com  had thirteen categories and each is divided into front burner and back burner segments.  Wonder if they had more people at the table, umh!

According to one resource, kale is out.  I'm all for eating kale, but kale chips?  Not so sure about those.  One resource had cauliflower rising to the top.  Still in the cruciferous family.  In 2011, sweet potatoes were the new 'in' food.  While I am not sure about the accuracy of these lists, I am very happy to see vegetables making the top of the list.  It feels like vegetables are finally getting their due respect.

In keeping with this 'trend thing' and my recent trip to Sicily, I'm cooking a dish with pasta and cauliflower.  Americans seem to believe that pasta dishes must be drowned in sauces, especially tomato sauce.  But Italian pasta dishes are so much more than pasta and sauces.  Italians make very good use of vegetables. 

For this dish, I am using Lidia Bastianich's book, Lidia Cooks from the Heart of Italy.  I did adapt the recipe somewhat.  I did not have fresh cavatelli pasta.  I used dried campanelle pasta and cooked the pasta and cauliflower in the same water. 

Pasta with Cauliflower

Serves 6.

Ingredients:
½ teaspoon Kosher salt, plus more for pasta pot
1 large head cauliflower, cut into small florets
1 pound dried pasta
½ cup extra virgin olive oil
7 large garlic cloves, peeled and sliced
½ teaspoon red pepper flakes, or to taste
2 Tablespoons chopped flat leaf parsley
1 cup freshly grated Parmesan cheese

Directions:
1.  Fill a large pot with water and about 1 tablespoon salt.  Heat to boiling. 

2.  Add cauliflower and cook for about 1 minute.  Add pasta and continue to cook until pasta is al dente, about 5 minutes.

3.  Preheat a large skillet.  Pour in the olive oil.  Toss in the sliced garlic.  Add red pepper flakes and parsley; stir and cook for about one minute.  Add about ½ cup of the pasta water.  Reduce heat and simmer until ready to add the pasta. 

4.  Drain pasta and cauliflower.  Add to skillet.  Toss pasta and cauliflower until they are coated with the sauce.

5.   Turn off the heat.  Add the cheese and toss again.  Heap the pasta into warm bowls.  Sprinkle with additional cheese, if desired.